I finally decided to dive into wood carving after I picked up a “power carving” magazine at Barnes and Noble while Ben and I were at the mall and realized just how easy it could be to throw together a workshop at the house and start small. When it comes to woodcrafting, I always thought it might be too big of a hobby, working with desks and cabinetry and the like, but had the epiphany thanks to Power Carving that carving is a great way to work with wood at a smaller scale since there is less function to uphold, and the workshop tooling footprint will also be smaller.
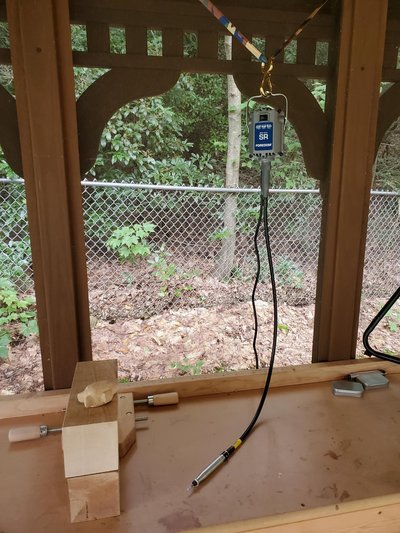
Thus, the idea was born to set myself up with some power carving gear somewhere at the house. Since our backyard gazebo is generally unoccupied, provides excellent ventilation, and has power outlets, I figured I’d set up shop there. Mom applied sealant onto my old R/C workbench, which was originally downstairs, so it would be OK outdoors, and I hung the power carving tool from the roof beams themselves with a ratchet strap and a automotive clip we found at Tractor Supply.
I originally thought I might be able to get away with a dust collector in the basement and start with smaller wood projects, but that idea quickly dissolved as I began to use the carving machine (which is basically a more powerful dremel with a flexible piece to make it easier to use instead of having the motor inside the handle). Sawdust went everywhere and caked up all on the floor and every surface imaginable, so I made the right call there, and I’m glad I didn’t make a stupid beginner mistake of working inside.
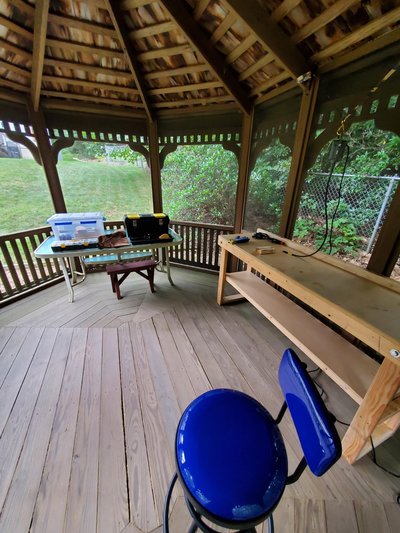
 I figured I’d get a seat too that was high enough to use at the bench, so here we are.
I got all my stuff from Woodcraft, so I had a few extra blocks of wood that helped raise my working space a bit while I was standing and gave me an edge to help with the process while I manipulated the machine to carve and sand all around. Having a few blocks stacked like this really did help as I had to twist the handle of the machine around, including having it angled towards the ground, and I would have had to otherwise use the edge of the table or something.
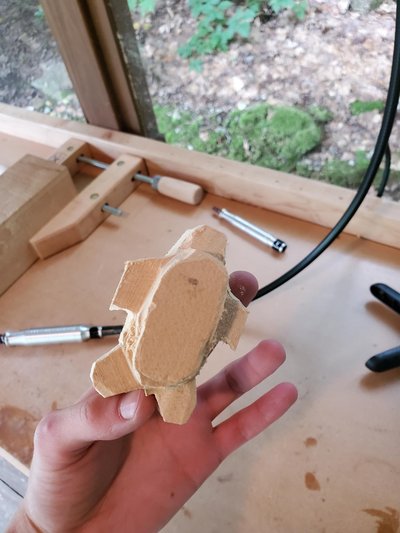
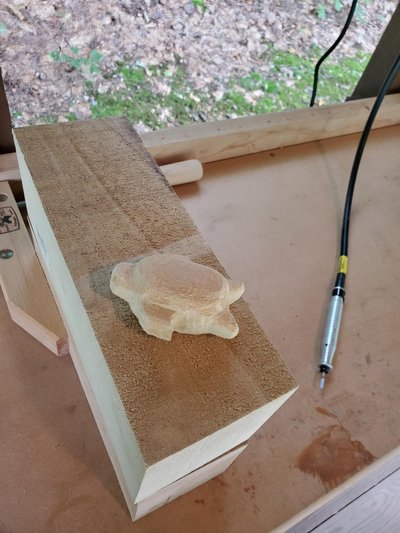
Ideas for a first (small) project? A bird, a turtle, a pair of dice, and others… I settled on a turtle after seeing an example online that I liked and went for it. I didn’t really care to follow any outline, I just started cutting the wood into the rough outline of a turtle and figured I’d go from there. Below you can see this outline - very rough indeed, but it’s well on its way to being a less blocky looking thing.
Cutting gloves, safety glasses (and goggles are great when you’re really removing wood to keep the dust out of your eyes), an apron, and a fan are all essential. I could do with better lighting in this setup too.
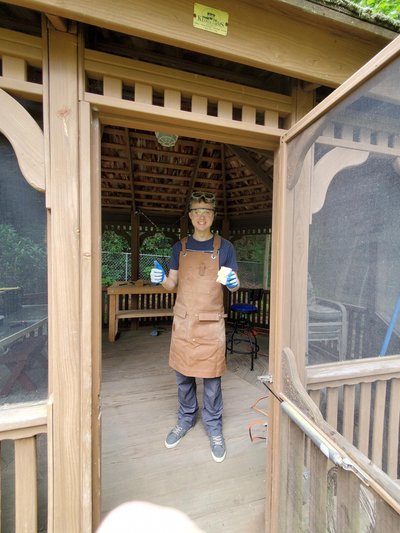
 The apron was absolutely essential. Ben says I look like a Minecraft NPC, thanks Ben.
After the basic shape is cut out from the wood, the work becomes more fine-tuned. I pulled out some smaller bits to carve and sand away at the edges so that they would be shaped better and rounded like a turtle would be. I wasn’t going for perfection here and realized that the turtle is “mirrored”, like both sides are the same (roughly), which is not correct from an animal kingdom perspective, but this piece is a cool token regardless, and I was very impressed with how well it came out even at this stage.

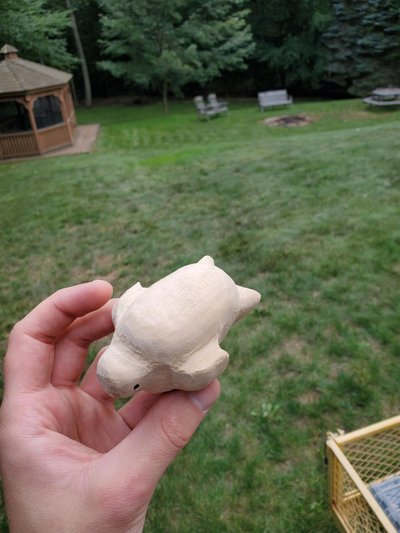
 Ready for more sanding, but it certainly looks like a turtle!
After polishing up the shape and sanding it down more to make it smooth, I quickly drilled in a few eyes and I think I used the wrong bit for that since it got hot enough to burn the inside a bit… but it was perfect because the eyes looked black!
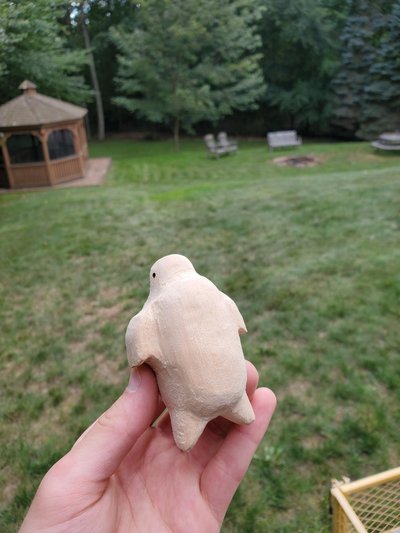
 My first wood carving - a fat turtle! Behold, the talisman of turtle smoothness!
All in all, because all the tools and gear were brand new to me, making this took around 3 hours, if not more, and I was tired when I finally got to the stage above. I felt happy with the shape and smoothness and that my first carving project was a success, albeit I could certainly spend another hour or two and make it a lot more realistic, do a shell design, maybe even paint it (?), etc… maybe someday!
More to come! I made the investment in some good gear and I plan to put it to use!
I highly recommend this hobby to anyone who wants to work with wood but doesn’t have the space or desire to build larger projects like furniture or the like. This is a lot of fun and very rewarding. Sanding and shaping after the rough cut is done is particularly soothing and artistic.
Until next time,
Daniel